
The Fastest Crochet Blanket I've Ever Made (Using 5 Yarn Strands!)
- Tiffany Hansen
- 16 hours ago
- 6 min read

*This post may contain affiliate links to support the cost of this blog. At no cost to you, I may make a small commission if you purchase through these links. Read our Privacy Policy HERE
Hey guys!
You know that feeling when you just want to make a blanket fast—like, you want the coziness, the satisfaction, the finished project, but you really don’t want to commit to three weeks (or let’s be real… three months) of stitching? Yeah, SAME. So let me tell you—I just discovered a crochet method that changed the game for me: crocheting with five strands of yarn held together.
This isn’t just fast. It’s wildly fast. And I’m kind of obsessed with how this blanket turned out. 😍
Why I Tried This
I’ve been wanting to make a cozy throw that looked chunky and boutique-worthy but without using a super bulky yarn that feels like you’re wrestling a bear. Bulky yarn is great, don’t get me wrong, but it can wear out your hands and wrists quick—especially if you’re binging a show and crocheting for hours (guilty 🙋♀️).

So instead of using a jumbo yarn, I grabbed five skeins from my stash and held them together like one yarn. That’s it. That’s the trick. And WOW—it worked.
What You’ll Need
Here’s what I used and recommend for this project:
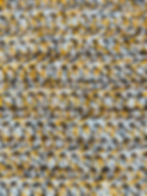
🧶 Yarn: Michaels Loops & Threads Impeccable Yarn in these five colors:
I used about 4 skeins of each color, but feel free to play with your own palette—this is such a fun stash buster!
🪝 Hook: A large 15mm crochet hook.
Click Here: https://amzn.to/3YzxedG
Click Here: https://amzn.to/3GsCTMi
✂️ Scissors.
Click Here: https://amzn.to/42mbmF8
Click Here: https://amzn.to/4cEigZH
Pattern
Align all 5 yarn strands together. Comb the strands straight so you are working with what would look like one yarn.
Create your slip knot and make 51 chains.
Row 1: hdc in the 3rd ch from hook. Sometimes I will stick my finger in the chain to make sure I am placing my hook in a clear space and not accidentally splitting yarn strands.
The skipped 2 loops count as your first hdc st.
Then make one hdc in each chain across.
This row will take the longest of this entire project. Working off the foundation chain is always the most tedious. Embrace this, work slowly so you don’t mess up any strands and finish the row.
You will want a total of 50 sts at the end of Row 1.

For Row 2 - 53:
Ch 1 tall loose chain, turn your work, and make one hdc stitch in each st.
Use my finger trick! Place your finger in the top of the stitch under both loops to guide
your crochet hook.
Do NOT treat this project as a relaxation, mindless project. Also, do not focus on how
fast you can crochet. Be mindful of every stitch. We are making a very simple, basic
hdc stitch BUT with working 5 yarn strands at once it is SUPER EASY for one of those
strands to slip off your hook.
This happened to me multiple times which is why I share this caution with you. It’s really
not that big of a deal if you do have to go back a row to fix that stitch and pick up that
loop. So, please don’t let it frustrate you when this happens.
When you run out of one color, and they will all run out at completely different locations in your blanket. The method I use to join more yarn to my project is the Invisible Knot trick.
Once you finish row 53, we are going to jump right into the finishing border.
Border
Ch 1 loosely, turn your work
sc in every st.
In corner #1, you will make 3 sc sts.
The first sc counts as the last st for this side of the blanket.
The second sc st is your turning stitch creating a smooth transition to the next side of your blanket.
The third sc st counts as the first st for the next side of your blanket.
When working along the sides of your blanket, with this sc st border, we are going to make one loose sc in the side of every row.
In corner #2 OR the last row, you will make your 3 sc sts, rotate your blanket so you are now working along the bottom side of the blanket where the foundation row is.
We do not want to work the other side of the foundation chain, that will look weird and miss-match. To make the border mesh well with the blanket, we will work our sc border between the stitches of Row 1. Your count will be fine but in case you are concerned we should have 50 sts along the bottom side of the blanket.
Corner #3 is worked again with the 3 sc sts.

Work side number 4 the same as we worked side 2. If you are having a harder time spotting where to place your crochet hook, just keep in mind to follow the row as best you can AND know that the side of the blanket should have 53 stitches.
In Corner #4, we will only make 2 sc sts because there is already one sc st in this spot. The very first sc stitch we made for our border.
Make your 2 sc sts in this corner, then sl st into the top of the very first sc st to close the border.
Cut a long enough tail to weave in your ends. Approximately 6 inches long or more.
Tie off your work.
Weave in both of your tails with your large yarn needle.
Project is complete!
I hope you love it and I hope you had fun!
Right-Handed Video Tutorial
Left-Handed Video Tutorial
📏 Finished Size: 42” wide x 53” long
🧵 Skill Level: Easy
Written in US Crochet Terms
This blanket uses the half double crochet stitch—simple, beginner-friendly, and perfect for showing off the texture created by all those yarn strands working together.
Real Talk: The Yarn Eats Itself Alive (And That’s Okay)
Yes, crocheting with 5 strands at once does eat up yarn like it’s starving—but honestly? That’s part of the fun. You get to see fast progress, use up leftover yarn from your stash, and finally do something with all those half-skeins you've been holding onto “just in case.” This is the kind of project that makes you feel productive and creative.
And if you’re anything like me, speed > stash hoarding. 😉
Tips for Crocheting with 5 Strands
🔸 Comb your strands before you start and every so often as you go. This helps prevent looping or separation.
🔸 Use your finger trick! I often place my finger in a stitch before inserting my hook to make sure I’m not splitting the strands.
🔸 Keep your tension relaxed. The tighter you stitch, the harder it is to keep those strands happy.
🔸 Be mindful of every stitch. This isn’t your zone-out-and-crochet project—at least not until you find your groove. Keep an eye out for runaway strands so they don’t leave loopy surprises a few rows later.
🔸 Try the Invisible Knot Method when adding new yarn! It creates a seamless join that won’t unravel—and no ends to weave in later. 🙌
Final Thoughts -
This blanket came together SO fast I was genuinely shocked. Like, did I skip something?? No—just 5 strands of yarn working overtime to make something thick, warm, and ridiculously pretty. It’s got all the vibes of a weighted blanket without actually weighing 15 pounds.

If you’ve never tried holding multiple strands together, I highly recommend giving it a go. Start with three if five feels like a lot—but I think you’ll be surprised at how easy it is once you start.
I’m already dreaming up my next version in all neutrals… or maybe even working with different textures together. 😍 The options are endless.
Try It Out!
Tell Me!
Have you ever crocheted with multiple strands of yarn before? What color combo would YOU try? Let me know in the comments or tag me on Instagram @CrochetWithTiffany.
Use the hashtag #CrochetWithTiffany so I can see your projects!
I hope you have the BEST day
💛—Tiffany